
Following are the step by step how to open a google email using Chrome browser.
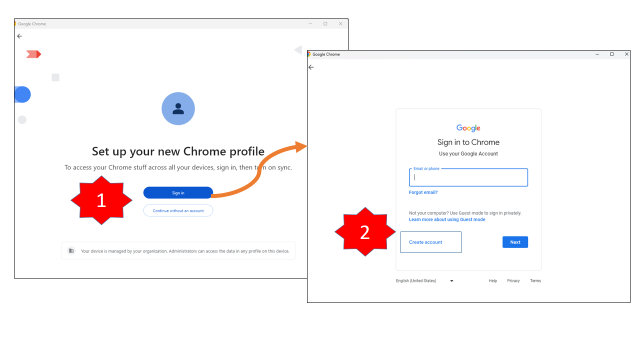
1. Open as google Chrome browser & Sign In
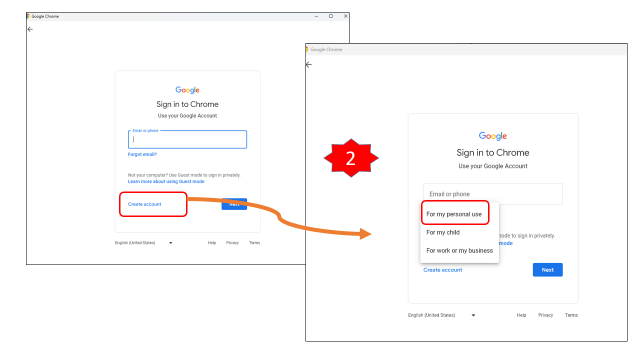
2. Select Create Account
- Select “For my personal use”
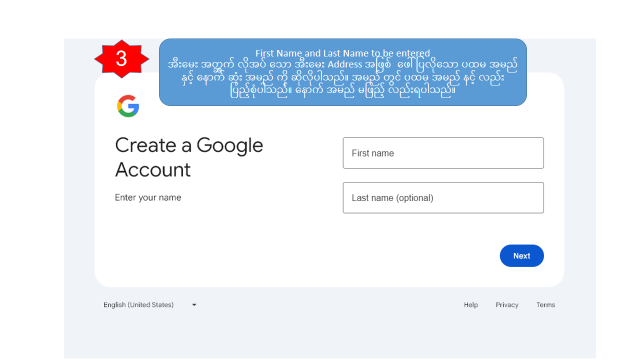
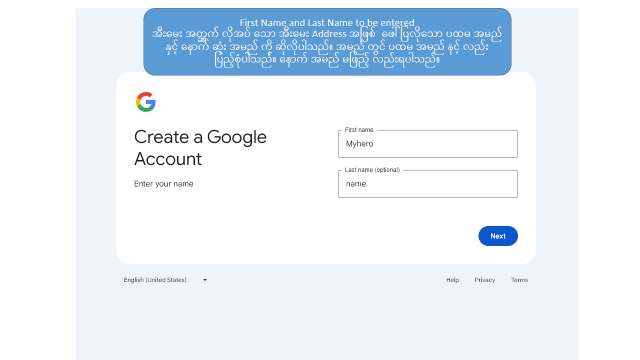
3. First Name and Last Name to be entered
- It means the first name and last name that you want to show as the e-mail address required for e-mail. The first name in the name is complete. I have to fill in the next name.
- အီးမေး အတွက် လိုအပ် သော အီးမေး Address အဖြစ် ဖေါ် ပြလိုသော ပထမ အမည် နှင့် နောက် ဆုံး အမည် ကို ဆိုလိုပါသည်။ အမည် တွင် ပထမ အမည် နင့် လည်း ပြည့်စုံပါသည်။ နောက် အမည် မဖြည့် လည်းရပါသည်။
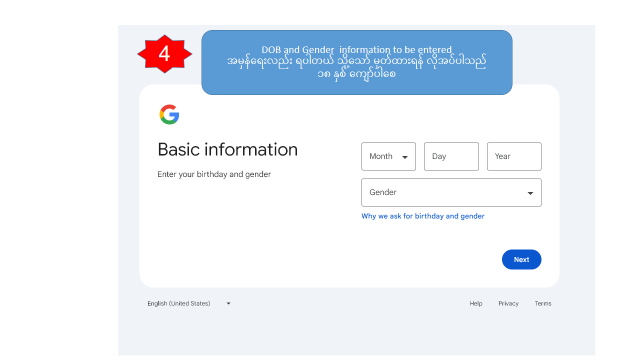
4. DOB and Gender information to be entered
အမှန်ရေးလည်း ရပါတယ် သို့သော် မှတ်ထားရန် လိုအပ်ပါသည်။
၁၈ နှစ် ကျော်ပါစေ
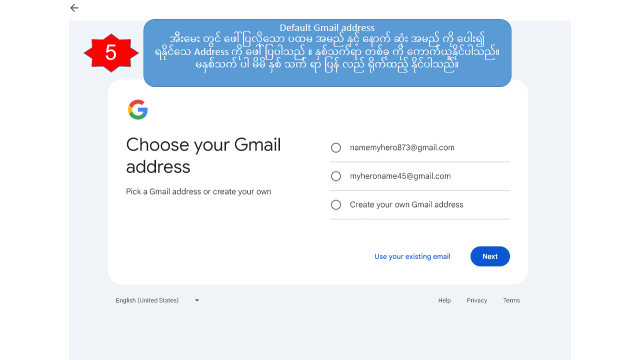
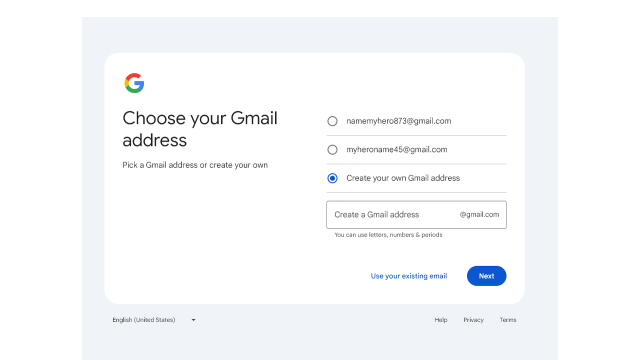
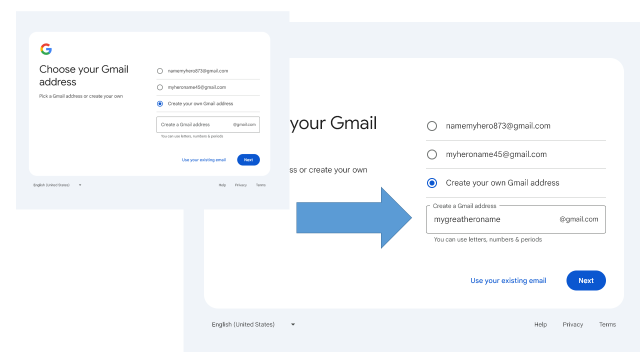
5. Default Gmail address
အီးမေး တွင် ဖေါ် ပြလိုသော ပထမ အမည် နှင့် နောက် ဆုံး အမည် ကို ပေါး၍ ရနိုင်သေ Address ကို ဖေါ်ပြပါသည် ။ နှစ်သက်ရာ တစ်ခု ကို ကောက်ယူနိုင်ပါသည်။
မနှစ်သက် ပါ မိမိ နှစ် သက် ရာ ပြန် လည် ရိုက်ထည့် နိုင်ပါသည်။
6. User Password
- Enter Password and confirm the password.
- မိမိ အီးမေး အတွက် စကားဝှက် ကို ပေးပါ
- စကားဝှက် နှစ်ခု ကိုက်ညီစေရန် show password ကို tick လုပ်၍ စစ်ပါ။

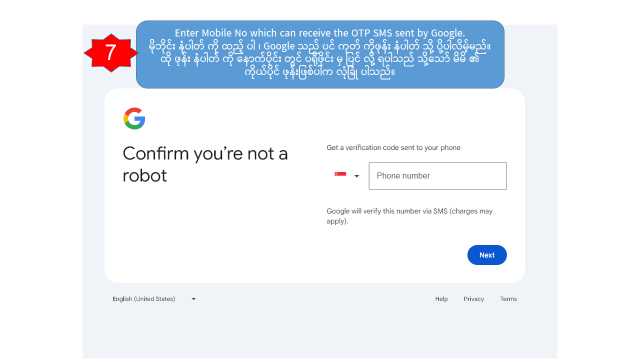
7. Enter Valid Mobile Number
- Enter Mobile No which can receive the OTP SMS sent by Google.
- မိုဘိုင်း နံပါတ် ကို ထည့် ပါ ၊ Google သည် ပင် ကုတ် ကိုဖုန်း နံပါတ် သို့ ပို့ပါလိမ့်မည်။ ထို ဖုန်း နံပါတ် ကို နောက်ပိုင်း တွင် ပရိုဖိုင်း မှ ပြင် လို့ ရပါသည် သို့သော် မိမိ ၏ ကိုယ်ပိုင် ဖုန်းဖြစ်ပါက လုံခြုံ ပါသည်။
8. Enter SMS Code
- Enter Code received as SMS sent by Google.
- Google သည် ပင် ကုတ် ကိုဖုန်း နံပါတ် သို့ ပို့ပါလိမ့်မည်။ နံပါတ် ကို ထည့် ပါ ၊

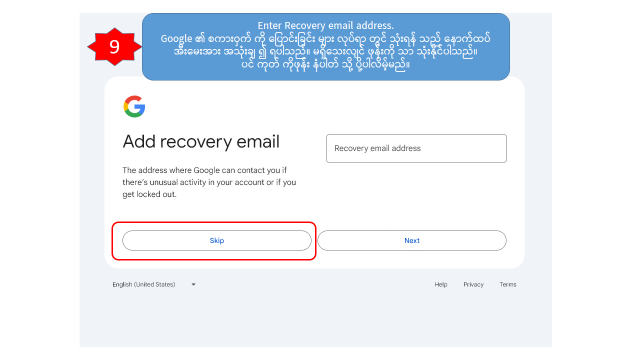
9. Recovery Email
- Enter Recovery email address.
- Google ၏ စကားဝှက် ကို ပြောင်းခြင်း များ လုပ်ရာ တွင် သုံးရန် သည် နောက်ထပ် အီးမေးအား အသုံးချ ၍ ရပါသည်။ မရှိသေးလျင် ဖုန်းကို သာ သုံးနိုင်ပါသည်။
- ပင် ကုတ် ကိုဖုန်း နံပါတ် သို့ ပို့ပါလိမ့်မည်။
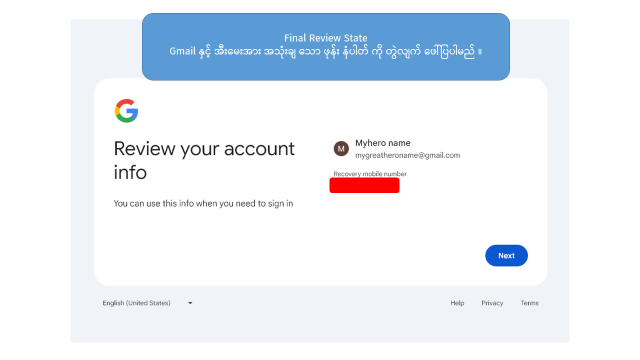
Email Review
After filling the recovery email, review account info will be displayed.
- Final Review State
- Gmail နှင့် အီးမေးအား အသုံးချ သော ဖုန်း နံပါတ် ကို တွဲလျက် ဖေါ်ပြပါမည် ။
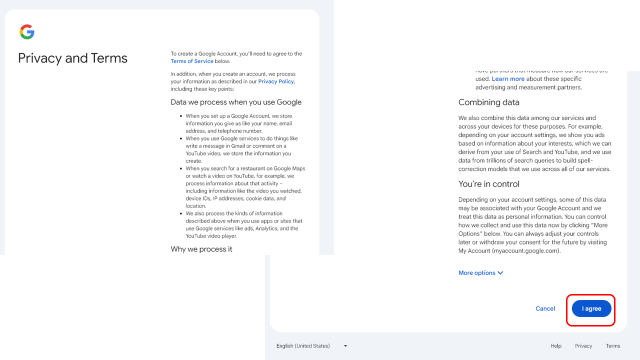
Google’s Privacy and Terms will be displayed and the is a checkbox to be agreed.
When the email creation has successfully completed
The whole process of Gmail opening completed with no error . When your gmail creation is successful, you can able to login the newly created email.